What is the installation process for PVC Trim Moulding on a deck?
As a supplier of PVC Trim Moulding, I’ve had numerous conversations with customers about the best way to install this versatile product on their decks. PVC Trim Moulding offers a durable, low – maintenance alternative to traditional wood trim, and understanding its installation process is key to achieving a beautiful and long – lasting result. Here, I’ll break down the step – by – step installation process for PVC Trim Moulding on a deck. PVC Trim Moulding

Step 1: Measurement and Planning
Before you start the installation, accurate measurement is crucial. Measure the length of the areas where you plan to install the PVC Trim Moulding, including the edges of the deck boards, stair risers, and any corners. Make sure to measure twice to avoid errors. Also, consider the layout of your deck. Plan how you will join the pieces of trim, whether at corners or where sections meet. For example, for outside corners, you might use a miter joint. Knowing the number of pieces and the type of joints ahead of time will save you time during installation.
It’s also a good idea to make a list of all the tools and materials you’ll need. For PVC Trim Moulding installation on a deck, you’ll typically need a miter saw for cutting the pieces at the right angles, a drill for pre – drilling holes, a pneumatic or cordless nail gun for fastening, a measuring tape, a level to ensure the trim is straight, and caulking for sealing joints.
Step 2: Preparation of the Deck Surface
The deck surface should be clean, dry, and free of debris before installing the PVC Trim Moulding. Check for any loose or uneven boards and repair them if necessary. A smooth and even surface will ensure that the trim fits properly and looks professional. If the deck has been painted or stained, ensure that the paint or stain is fully cured.
For areas where the PVC Trim Moulding will be attached, it’s recommended to sand the surface lightly. This helps the adhesive or fasteners to adhere better. If you’re using a primer on the PVC before installation, apply it according to the manufacturer’s instructions and let it dry completely.
Step 3: Cutting the PVC Trim Moulding
Using a miter saw, cut the PVC Trim Moulding to the appropriate lengths. When cutting for corners, set the saw to the correct miter angle. For a standard 90 – degree outside corner, a 45 – degree miter cut on each piece of trim will create a neat joint. Make sure to wear safety goggles and follow all safety precautions when using the saw.
After cutting, inspect each piece for any rough edges. You can use a sanding block or file to smooth out the edges. This not only makes the piece look better but also ensures a proper fit. Remember to store the cut pieces carefully to prevent any damage.
Step 4: Pre – drilling Holes
Pre – drilling holes in the PVC Trim Moulding is an important step, especially if you’re using nails or screws to fasten it. The pre – drilled holes prevent the PVC from cracking during installation. Use a drill bit that is slightly smaller than the diameter of the nails or screws you’ll be using. Drill the holes at regular intervals, usually about 12 to 16 inches apart.
When pre – drilling, be careful not to drill too deep. The holes should be just deep enough to accommodate the fasteners without going through the deck surface. If you’re installing the trim on a curved area of the deck, you may need to make more frequent pre – drilled holes to ensure a secure fit.
Step 5: Installation of the PVC Trim Moulding
Start by positioning the first piece of PVC Trim Moulding at the beginning of the area you’re working on. Use a level to ensure it is straight and plumb. If the trim is for a long edge, you can use a temporary brace to hold it in place while you start fastening.
Once the trim is in position, gently insert nails or screws through the pre – drilled holes and into the deck surface. Avoid over – tightening the fasteners, as this can cause the PVC to crack. For a more secure and professional look, you can use a combination of nails and construction adhesive. Apply the adhesive to the back of the trim before positioning it on the deck.
When joining pieces of trim, use a high – quality PVC glue for a strong bond. For miter joints, clean the cut edges thoroughly and apply the glue evenly. Hold the pieces together for a few minutes until the glue starts to set. If there are any gaps between the trim pieces, you can use a caulking gun to fill them with a suitable PVC caulk.
Step 6: Finishing Touches
After all the PVC Trim Moulding has been installed, inspect the entire deck for any loose pieces or gaps. Tighten any loose fasteners and fill any remaining gaps with caulk. Use a putty knife to smooth the caulk and give it a professional finish.
If desired, you can paint the PVC Trim Moulding to match the color of your deck or to add a decorative touch. Make sure to use a paint that is compatible with PVC. Follow the painting instructions carefully, which may include priming the PVC first.
Why Choose Our PVC Trim Moulding?
Our PVC Trim Moulding is made from high – quality materials that offer excellent durability. It is resistant to rot, insects, and moisture, making it perfect for deck applications. Our products come in a variety of styles and profiles, allowing you to choose the one that best suits your deck design.
We also provide detailed installation guides with our products, which can be a great help, especially for first – time installers. Our customer service team is always available to answer any questions you may have about the installation process or the product itself.
Contact Us for Your Purchase
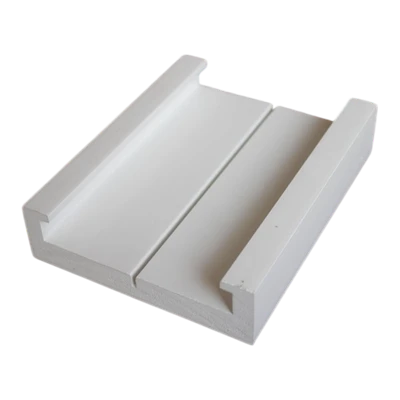
If you’re interested in purchasing our PVC Trim Moulding for your deck project, we encourage you to get in touch with us. We offer competitive prices and can provide you with the right amount of product based on your measurements. Our representatives are ready to discuss your project requirements, offer advice on installation, and help you make the best choice for your deck.
Anti-microbial PVC Foam Board Whether you’re a professional contractor or a DIY enthusiast, our PVC Trim Moulding is a great option for your deck. Don’t hesitate to reach out and start transforming your deck with our high – quality products.
References
- "Deck Building Basics" by John Doe, a general guide on deck construction and finishing materials.
- "PVC Materials and Applications" published by a leading polymer research institute, which provides in – depth information on the properties and uses of PVC.
- Manufacturer’s installation instructions for PVC Trim Moulding, which offer specific details on cutting, fastening, and finishing the product.
Jameson Performance Plastics Co., Ltd.
With abundant experience, we are one of the most professional PVC trim moulding manufacturers in China. We warmly welcome you to wholesale customized PVC trim moulding at competitive price from our factory. If you have any enquiry about free sample, please feel free to email us.
Address: No.97 Liuquan Road, Zibo city, Shandong, China.
E-mail: info@jamesonplastics.com
WebSite: https://www.jamesonplastics.com/
