Let me start by setting the scene—back when I first founded our valve seat reamer supply business, I’d hop on calls every week with technicians who’d spent hundreds on our tools, only to report rough cuts, premature valve failure, or engines that ran like they were missing a cylinder. Most of the time, the problem wasn’t the reamer itself. It was that they skipped the calibration step entirely. That’s when I realized: no matter how precise our reamers are when they leave our workshop, if they’re not calibrated correctly by the end user, they’re just a fancy hunk of metal. Over the years, I’ve walked through calibration with thousands of small engine mechanics, race shop specialists, and even heavy equipment technicians, and I’ve boiled the process down to a step-by-step, reliable workflow that works for every valve seat reamer we supply. I’m sharing that process here today—no confusing jargon, just the same guidance I give to everyone who picks up our tools. Valve Seat Reamer
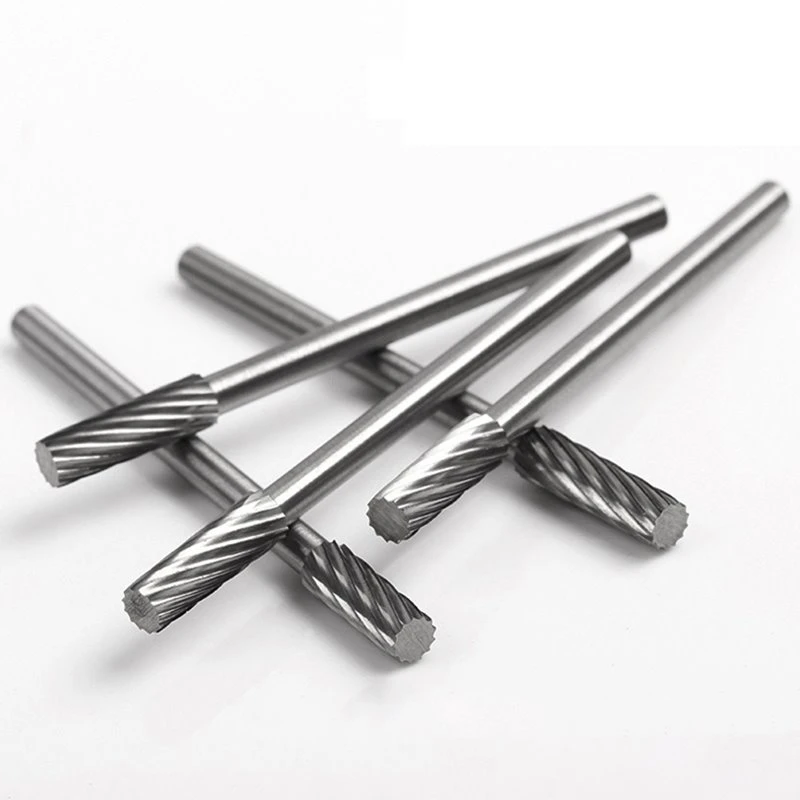
First, let’s get one thing straight: what valve seat reamer calibration actually is, and why it matters so much. When you machine a valve seat, you’re not just cutting a groove into the head. You’re creating a seamless, 360-degree contact surface between the valve face and the seat. If that contact is off by even a fraction of a millimeter, you get leak-down, valve burn, or compression loss—costing you more time and money than any calibration take 10 minutes. Our reamers are machined to tolerances of 0.0002 inches in our factory, but calibration is the final check that aligns that precision to your specific cylinder head. It’s not a one-and-done step, either. Every time you switch reamers for a different valve size, or if your reamer takes a hard hit (common when working on rusted seats), you need to recalibrate. Even minor vibration during use can throw your alignment off, so it’s good practice to calibrate at the start of every job.
Let’s gather your tools and parts first. You won’t need anything fancy—all of this is standard in most mechanic shops. First, your valve seat reamer, obviously—we recommend using our aligned pilot-style reamers, since they make this step 50% easier than the old non-aligned ones. Next, a matching pilot for your valve size. This is critical: never use a pilot that’s too small or too large. A pilot that’s 0.0005 inches smaller than your valve guide will wobble, and one that’s too big will bind, both ruining your calibration. We supply matching pilots with every reamer we sell, so if you’re using one of our sets, you’re already covered. You’ll also need a dial indicator (the kind with a magnetic base works best), a cylinder head that’s been cleaned and mounted securely (no warpage, no cracked decks—we always recommend checking head flatness first, just to be safe), and a valve that matches the seat you’re working on. A few rags to catch metal shavings, and a pair of calipers to double-check pilot and valve sizes, and you’re set.
Now, step one: prep your workspace and your cylinder head. I can’t tell you how many times I’ve seen mechanics rush this part. If your head is covered in old carbon, rust, or leftover gasket material, that’s going to throw off every measurement you take. Grab a wire brush (or even a small scraper, just be gentle not to scratch the guide) and clean the valve guide and the area around the seat you’re working on. Then, secure the cylinder head to a workbench with clamping pressure—you want it stable, no shifting, no rocking. Double-check that the valve guide is in good shape: if it’s worn more than 0.001 inches, that’s a separate issue you need to address before calibration, because a worn guide will make even the best calibration go wonky. We actually include a free guide wear gauge with every reamer set we sell, so that’s part of our value—we don’t just sell tools, we sell the guidance to use them right.
Step two: install your pilot and align the reamer. This is where a lot of people mess up. First, slide the matching pilot into the valve guide. Push it all the way in, and make sure it seats flat against the top of the guide—if there’s a gap between the pilot and the guide face, that’s a sign the pilot is wrong or the guide is worn. Then, slide your reamer onto the pilot. Twist it gently until it sits snugly, not forcing it—if it’s hard to turn, you’ve got the wrong pilot size or it’s misaligned. Now, here’s the key check: hold the reamer by the body, and wiggle it side to side. There should be zero play. If there’s any movement, that’s your first red flag—either the pilot is wrong, the guide is worn, or the reamer is bent. We test every reamer for straightness before it leaves our facility, so if you have that play, it’s almost certainly a pilot issue, or you installed it wrong.
Step three: set up your dial indicator for measurement. This is the part that turns calibration from a guess into an exact science. Grab your dial indicator and attach the magnetic base to the workbench or the cylinder head, making sure the base is stable and won’t move during measurement. Adjust the indicator’s plunger so it touches the side of the reamer’s cutting body, about halfway up the length of the reamer (not too close to the pilot, not too close to the top). Zero the dial indicator now—turn the bezel until the needle points straight at zero. Now, slowly rotate the reamer all the way around 360 degrees, keeping the plunger pressed firmly against the body. Watch the needle. If it moves more than 0.001 inches (that’s one thousandth of an inch, a tiny amount you can barely feel), that means your reamer is out of alignment. That’s exactly what calibration will fix. A lot of first-timers panic here, but that’s normal—almost every reamer needs calibration at first, especially if it’s a new set.
Step four: adjust the reamer’s alignment set screws. Wait—yes, most valve seat reamers have small set screws on the body that let you adjust their alignment, and that’s the actual calibration step. If the dial indicator showed more than 0.001 inches of runout, loosen the two primary set screws that sit opposite each other on the reamer body, about 180 degrees apart. Then, tighten the set screw that’s on the side where the needle was at its highest point. For example, if when you spun the reamer, the needle went up at the 3 o’clock position and down at the 9 o’clock position, you tighten the set screw at 3 o’clock. How much? A quarter turn at a time, then recheck the dial indicator. Don’t over-tighten—these are tiny adjustments. We always tell our customers: if you turn a set screw more than a quarter turn, you’re doing too much. Go slow, recheck after every small adjustment.
Step five: verify your calibration is correct. Once you’ve made small adjustments and the dial indicator shows less than 0.0005 inches of runout (that’s half the thickness of a human hair, so it’s very precise), you’re almost there. Now, do a final check: remove the pilot, put the valve into the guide, and hold the valve face up to where the seat will be. There’s a simple trick to check contact: dab a little light layout dye (we recommend the fast-drying kind for this) onto the valve face, then gently press the valve against the seat and twist it a quarter turn. Remove the valve—you should see a perfect, uniform ring of dye all around the face, no gaps, no thin spots, no overlaps. If the ring is uneven, go back and make a tiny adjustment to the reamer set screws, then recheck. That uniform ring is what prevents leaks and ensures your valve will seat correctly every time.
Wait a second—what about different types of reamers? Because we supply different reamers for different jobs, right? The calibration process I just walked you through works for the standard carbon steel reamers we use for gasoline and small diesel engines, but for carbide-tipped reamers (which we also supply for high-performance racing and heavy-duty equipment), there’s a small tweak. Carbide reamers are more rigid, so the runout tolerance is even tighter—aim for less than 0.0003 inches of runout on the dial indicator, and make sure your layout dye ring is perfectly uniform, not just slightly uneven. For angle-cut reamers (for 30, 45, and 60 degree seats), the calibration is the same, just make sure you’re using the correct pilot for each angle—we label our pilots clearly so you don’t mix them up.
Now, common mistakes I see every day, that I wish every technician would avoid. First, using a worn pilot. A lot of guys grab the first pilot that fits, even if it’s got scratches or play in it from previous use. That will throw off your calibration every time—always check your pilot for wear before you start, and replace them when they’re more than 0.0005 inches undersized. Second, rushing the set screw adjustments. I’ve had mechanics tell me they tightened a set screw a full turn and ended up with a reamer that was so misaligned, they had to scrap a cylinder head. Go slow, small adjustments, recheck after every move. Third, calibrating on a warped or dirty cylinder head. A head with 0.002 inches of deck warpage will give you a false runout reading, so always check head flatness first—most aftermarket heads come with a flatness spec, and if it’s out, you’ll need to resurface it before working on seats. And fourth, forgetting to recalibrate after a hard hit. If you accidentally drop your reamer, or it takes a hard bump while you’re cutting a rusted seat, stop and recalibrate right away—don’t assume it’s still aligned.
Let me share a quick story that drives this home. Last year, a race shop owner reached out to us, panicking because he’d blown three engines in a single week after doing seat work. He’d been using a competitor’s reamers, and he admitted he never calibrated them—he just installed the pilot and started cutting. When I walked him through our calibration process, his first reamer had 0.003 inches of runout—way more than acceptable. After calibration, he did a test cut on a scrap head, and the dye ring was perfect. A month later, he sent me a photo of his team winning a regional championship, with a note that said that simple calibration step saved his season. That’s why I’m so passionate about this—this isn’t just a technical step, it’s what separates good work from great work, and it’s what makes our reamers worth every penny.

At the end of the day, valve seat reamer calibration isn’t rocket science. It’s a series of small, careful checks that take 10 to 15 minutes, and it makes all the difference in the quality of your work. Our team has spent years refining our reamer designs to make this process as simple and reliable as possible, because we know that when our customers succeed, we succeed. If you’re working on valve seat reamers and want to upgrade to tools that are precision-made for easy calibration, or if you have questions about any of the steps I walked through, our team is here to help. We work with small independent shops, large race teams, and heavy equipment operators across the globe, and we’d be happy to walk you through your specific calibration needs or provide guidance on the right reamer set for your work. Reach out to our team to discuss your project, browse our full line of valve seat reamers and accessories, or get answers to any questions you have about calibration or tool care. We’re here to make your job easier, one well-calibrated seat at a time.
Milling Cutter References:
- Automotive Engine Reconditioning: Technology and Practice, SAE International, 2019.
- Valve Seat Machining and Calibration Guidelines, Specialty Tool and Equipment Manufacturers Association, 2021.
- Precision Machining Tolerances for Small Engine Components, Small Engine Technology Journal, Vol. 47, No. 2, 2020.
- Calibration Protocols for Rotary Cutting Tools, National Institute of Metalworking Skills, 2022.
Kunshan Zhiyi Dingli Cemented Carbide Tool Co., Ltd.
We are one of the most professional valve seat reamer manufacturers and suppliers in China, also support customized service. We warmly welcome you to wholesale high quality valve seat reamer made in China here from our factory. If you have any enquiry about cooperation, please feel free to email us.
Address: No. 80 Chuangfu Road, Qiandeng Town, Mondragon Industrial Park, Kunshan City, Suzhou, Jiangsu, China.
E-mail: 2060056236@qq.com
WebSite: https://www.kszydl.net/
